Fuji Build… O boy!

On with the Build!!!

I have had a busy week but I managed to get an hour or so into the bike and this is what I have gotten done.

I know the rear derailleur is not on there but just a pic of the setup

-Rear wheel. Barely had enough clearance in the frame. It sits real tight but that should not be a problem since it is made for 26ers

-Bottom Bracket. I was lucky enough to have the same 68mm and correct spindle length bottom bracket that it just happened to swap perfectly.

-Cranks. This also goes with the BB but they swapped over just the right length and we are go to go on there. It has a little bit less clearance than on the rockhopper but it is enough!

-Disc Brakes. Both front and rear went on like cake walk. Some minor adjustments had to be made but nothing major. So far so good for cabling transferring over on the right length.

Shot of the rear disc brake

-Rear Derailleur. The Shimano swapped over very easily thanks to a standard bolt.

-Front Derailleur. This caused a bit more of a problem. I had a top-pulling derailleur from the rockhopper and that just wasn’t going to work with the new frame. I needed a traditional derailleur so I went to the LBS to pick up a Shimano Deore for the frame.

Side view of a traditional front derailleur


-Front Derailleur. This caused a bit more of a problem. I had a top-pulling derailleur from the rockhopper and that just wasn’t going to work with the new frame. I needed a traditional derailleur so I went to the LBS to pick up a Shimano Deore for the frame.

Another view of the Front Derailleur

Here is the makeshift headset in order to bring it to the LBS


-Headset. Biggest pain in the butt I could have imagined. When I bought the frame I saw that it was an integrated headset, no problem. I would have to buy a new headset but thats not a big deal. So I get onto Cane Creek and go to the headset finder. So far so good, right? I get to Fuji then model. Adventure comes up but it says 2010 model only. I found out that the “new” Fuji Adventure is a hybrid bike not my full suspension mountain bike. So I call up Cane Creek and they tell me to take some measurements. Of course I don’t have calipers so this is almost impossible to get absolutely accurate when they come within millimeters of each other. After that failed attempt it was off to the LBS to see if they can help. He figured out the headset and ordered one. Wrong! I guess it is a weird looking zerostack because the intergraded for those measurements did not fit. So I had to leave it there overnight while they get the right one in. So I will be picking it up soon!


I will post more pics of the details once I get the bike back.

Lessons… Part II

This morning I gave my second triathlon/swimming technique lesson. It went well… still couldn’t get that darn underwater camera working but at least I got video feedback in slow motion this time. I feel like I did a much better job of explaining what to do this time. Hooray! He also had quite the improvements and I think he now knows what he is suppose to be doing and now just has to put it into practice. Easier said than done, I know.


Thoughts:

-Teaching is a lot harder than I thought.

-Patience is key- since my cameras we not working, I also had to apologize a couple of times about not having those working.

-I think I want to be a swim coach… After teaching him, I found it real easy to explain what he was doing wrong. Now if it was a swimmer with some experience (on a swim team previously) I feel like I could really get people going FAST and efficiently

Repair Stand Thoughts… The Do’s and Don’t

I just thought I would post my final thoughts about the stand after using it a couple of times.

Likes: Homemade (DIY), sense of accomplishment, sturdy, easy to use, works well for the money!, CHEAP!

Dislikes: Clamping the bike is difficult at times (getting everything positioned sometime requires 2 hands), still twists a bit (but what bike stand doesn’t), wood does swivel at times

Thoughts:

-The bike stand is great for what I am looking to do (basic mechanics and repairs). As I get more into the mechanical work, I might have to upgrade but for now and most likely a while, this stand is great!

-For what ever reason, I am really getting a good sense of accomplishment out of this project. I could be because repair stand start a close to $100 and I made my whole thing for $35 all said and done. Maybe it is just that I liked the project more than anything, I am not really sure.

-The bike does wiggle a little bit in the stand but maybe some thicker (or another layer) of old bike tube could take care of that.

-The wood swiveling is sometimes annoying but in order to combat that, I drilled the holes closer in the second set of blocks I made (sorry I forgot to mention that in my second grip posting). This really is not anything major. I can easily find ways to work around it for 35 bucks!

Overall: Great stand for the money. If you are looking to do some basic to intermediate repairs and maintenance, this is an awesome stand for you! If you are looking to start a repair shop, might as well invest in a Parks Tool Co. stand…

Bike Stand Part II – The GRIP!

So after some thinking and input from some people, I finally figured out a solution on the clamp on my bike stand. As you recall from previous posts, I was struggling to find a way to clamp the bikes into the stand and not have them twist and turn while clamped. In order to do this, I came up with the idea of taking an old bike tube and cutting it into sizable chunks then laying it over the wood blocks that I cut out for holding the seat posts.

I went to my local bike shop and they gave me a weird look when I asked for some old mountain bike tubes but after explaining what I was doing, the guy was really interested and asked me how I made it. I think he might make one, thats how pumped he was to hear about it.

Anyways, When I got back to the house, I found out that it was not going to be as easy as planned. Long story short, after fitting and trying to size it up multiple times, the old blocks just were not going to work. I made new block and then cut the tubes to size and made relief slits on top so the rubber would fold flat against the wood.

and the test…. YES! It works! I can now crank on the bike if need be (crank pulling (no pun intended), bottom bracket removal, etc).

I forgot to take a pic of the wood block so I will do those once I get the chance and just add it onto this post.

DIY Project 1= check!

Early Mornin’ Ride

There is nothing like an early morning ride to get the heart pumping, blood running through your veins and the sweat dripping down your face. This morning I did a nice 28 miler while my girlfriend went for a long run. I was pretty much her “pace” car which entails mainly just carrying water for her and riding around in loops in the meantime. Even with that I got in a nice ride. I just enjoyed being out in the cool spring air even if it did mean I had to be her sherpa…


Along the way I found this sweet flower.

I regret not taking more pictures along the route but I was just trying to locate the other half (girlfriend) most of the time. I wish I could have taken a pic of this hill I conquered. It was ummm steep! I mean steeeeeep! For those of you who also live in the twin cities, it is the hill off Summit Ave that goes into Downtown St. Paul. It is rather steep. I will have to give it another go again soon (and take some pics this time…). Great training hill but I wouldn’t want to climb that too often.

Fuji Full Suspension FrameFrame

So I went into my Local Bike Store (LBS) that just opened and was looking around and they were selling a full suspension bike frame for cheap. I looked into it more and decided that I should go ahead and buy it. I figured since I bought a hardtail (’06 Specialized Rockhopper Comp Frame) frame to do a swap, I might as well just get a full suspension frame and not swap onto the hardtail frame. It is a 2005 Fuji Adventure Hi Full Suspension mountain bike frame (21″). So here we go… I am just about to start swapping parts (posts to come!)


DIY Roof Rack Fairing

I have started my DIY roof rack fairing after seeing that fairings cost $80+ for a piece of plastic. Its nuts! I know I can make one for cheaper

Tools List:

-Table Saw or Dremel

-Belt Sander or Dremel

-Torch (to heat up metal brackets)

-Vise

-Pillars (2 pairs)

-Masking tape (only if using a table saw)

Parts List:

-Piece of plexiglass

-4″ L-shaped brackets (found in hardware isle of Home Depot) – 3 or 4 brackets

-Carriage Bolts

-Fender washers

-Nuts (non-locking)

-Strip of door trim plastic (or something to keep the bottom of the fairing from scratching the car) (found at AutoZone or O’Reilly’s)

First things first… I measured out how long I wanted the fairing (would have liked 40″ but the piece of plexiglass I bought was 36″ long so that will have to do). Next was to make a cardboard model of the fairing.

Note: this make take some trial and error in order to make this correct. Make sure this is just how you want it as this is what it will be shaped like!

Once the cardboard model is complete, trace that onto the plexiglass. Now cutting. If using a table saw, put two strips of masking tape (thinly overlapping) on the cut line (this will help prevent from cracking). Remember to cut slowly and TAKE YOUR TIME! Plexiglass is not cheap. Once cut into a square (if using table saw), slowly sand off the excess to get to desired shape (Just about to start doing this, this weekend)

Brackets:

For the brackets, take the L-brackets and place into vise then start heating the bend. This may take some time.. Once heated, take a pillars and bend/work the metal into desired angle. This again is trial and error to see what angle works best for your roof rack. Repeat these steps to get the desired angles for all 3 or 4 brackets.

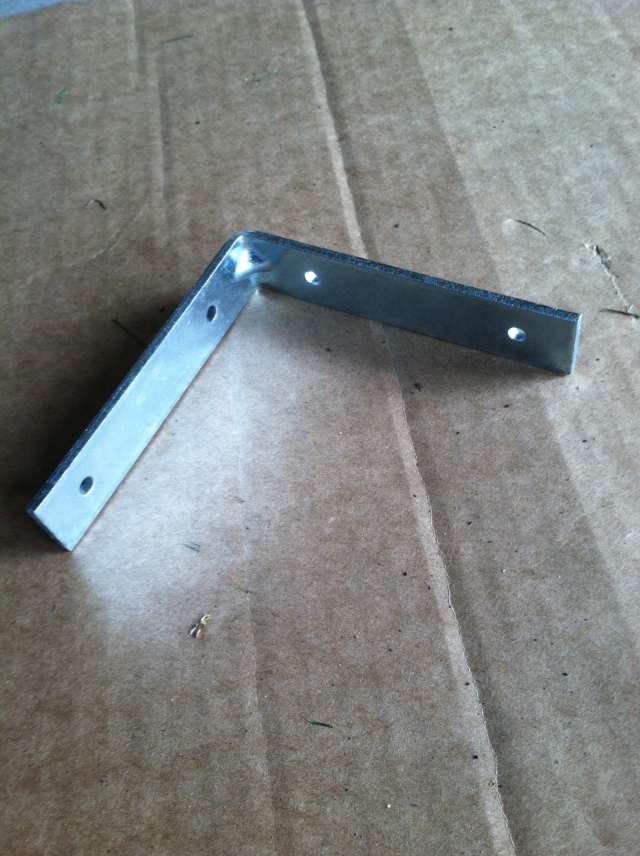
L-Brackets before bending

L-Brackets after bending

L-Bracket with hardware. My hand is where it will attach to roof rack.

This is as far as I have gotten so far. I will be continuing this project this upcoming weekend (time allowing) and hope to have it done and ready to roll! I will post sizes for hardware (I forgot sizes currently but will measure and post). I of course will post my steps as I go…

DIY Bike Stand Tray

So as I was looking at the bike stands online, I came up with another idea… A bike repair stand tray


Mechanics use trays to hold tools, parts, coffee, anything they need really.


Here is how I made mine…


Tools List:

-Hammer

-Finishing nails or regular nails (depends on the look you want)

-Saw to cut wood


Parts List:

-Piece of plywood (size depends on how big you would like the tray, I found a scrap piece I had kicking around that is about 18″ long and 9″ wide)

-Wood for edges (size depends on how deep you want the tray, I found scrap again and that was 1″x2″ high)

-1″ U-pole clamp (hint: found in the electrical section of Home Depot)


I cut the plywood down to size that I wanted. I then drilled a 1″ hole about 1″ in from the back and in the centered the hole. Once I drilled that, I tested it for size on the 60″ rigid pipe. Hint: if it is too big, put duct tape around the pole and slide the tray over that! Once you see that it fits, Pull it off and cut the edge pieces to proper length. Nail into side of plywood. Place the U-clamp in position of how high you want the tray to sit. Tighten the U-clamp and slide tray over the top so it sits on the U-clamp. And… DONE! Quick and simple yet very useful (and it save the back!).

Top view: notice how I used duct tape to help shim around the hole of the tray

U-Clamp (found in electrical section of Home Depot) which the tray just sits on

Another view of the tray top and edges


Remember to post pics of YOURS!!

DIY Bike Repair Stand Thoughts

I was just thinking of ways to improve this stand. With the towel wrapped around the seat post, the bike can twist (not ideal). I tried using some foam pipe insulation that I had laying around but that didn’t do much…


I am trying to find some sort of rubber (maybe a old bike tube) that I could use that is not smooth and would “catch” the seat post. I am thinking I might just have to go riding more to get a new tube or take a visit to the LBS to see if they have any laying around.


Any ideas about what I could use?