Its been a while… life got in the way (go figure right?) Anyways….
Here is a DIY Bike Stand for you. Since I have recently got into bike repair, I was in need of a bike repair stand. Looking them up online and they can be rather pricey! So I figured I would pull out the weekend warrior and build one myself.
Tools Needed:
-Drill and drill bits
-Wrenches
-Pipe Wrench
Parts List from local Home Depot or Menards:
-1″ rigid threaded pipe (60″ long)
-1″ to 3/4″ 90 degree elbow reducer
-3/4″ rigid threaded pipe (18″ long)
-1″ flange
-3/4″ Pony Clamp
-2′ x 2′ plywood (scrap bin if your lucky!)
-2″ x 4″ piece wood (12″ long is all that is needed for the clamp brace)
-1/2″ carriage bolts (or which ever size fits in your flange) – 4 bolts
-1/2″ fender washers (or which ever size fits in your flange) -8 washers
-1/2″ nuts (non locking) (or which ever size fits in your flange) – 4 nuts
Once I collected all the materials, I started with the base. Taking the flange and marking holes where I wanted to drill in the plywood for the carriage bolts to go through. Hint: you want them mainly in one corner to counter balance the weight of the bike but not completely in the corner as you will crack the plywood. Before drilling the holes you need to get rid of the wobble that the bolts would create on the bottom. In order to do that, you will have to drill some bigger holes to counter-sink the bolts.Drill the counter-sink holes big enough so the fender washer can fit inside. Drill the counter-sink holes first then drill through with the regular drill bits.
Once the carriage bolts can go through, tighten down. Hint: tight but not too tight, too tight will again make the plywood crack
The base is finished! Good work. Next up, screw in the 60″ long threaded rigid pipe into the flange and tighten with a pipe wrench or as tight as you can get it.
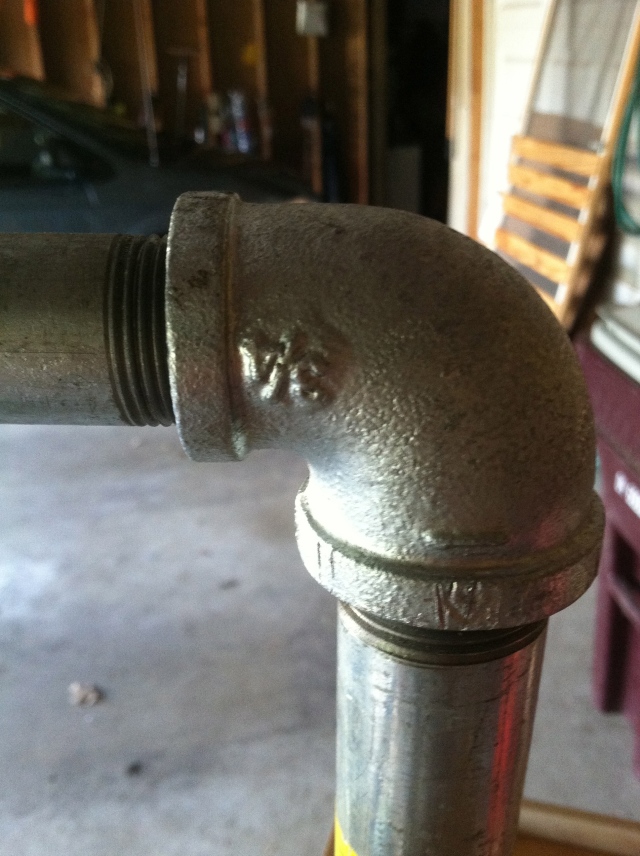
Next, screw in the 90 degree reducer. This you might need a pipe wrench for in order to get the elbow at the right angle (pardon the pun). Screw in the 3/4″ sized 18″ long threaded pipe into the other end of the elbow. Again pipe wrench would be good but not 100% necessary.
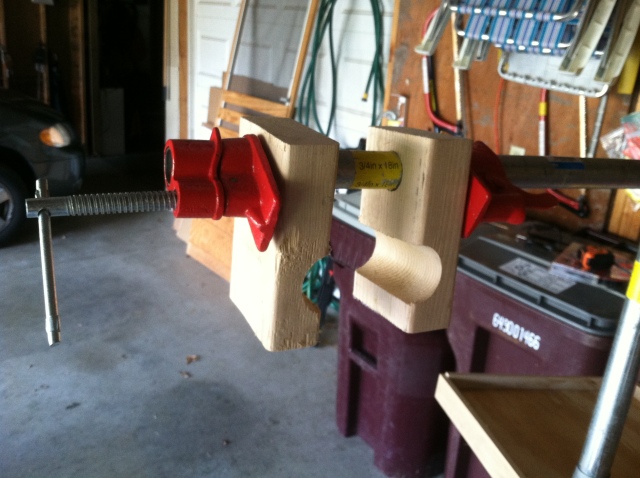
Now comes the tricky part! Put the 3/4″ pony clamp on to test for fitting. It should fit well. In order to get the bike to stay, you will need to create a clamping device for a seat post. Take your bike seat post and test it for size. Cut the 2×4 into 2 equally long pieces about ~6″ long. Clamp the two pieces together and drill a 3/4″ hole closer to one end (about 1 1/2″ away from end). This hole will be to slide onto the 3/4″ pipe. It is important that this piece fits almost tightly around the 3/4″ pipe. Once that is fitted well, clamp the pieces back together. Now find a bit that is slightly larger than your seat post. Drill this hole perpendicular to the first hole (see picture). Once this is drilled check for proper fitting for your seat post. Hint: you might have to get something to fill in order to make it fill the hole. Slide onto 3/4″ pipe and put the other end of the pony clamp on. This part was a bit difficult. Trial and error to find just the right angle for the pony clamp.
DONE!!!
Grease up those chains, put in a fresh bottom bracket, and put that chain whip to use now!
Feel free to comment on how this could be better. I am always open to new ideas and please POST YOUR PICS!


